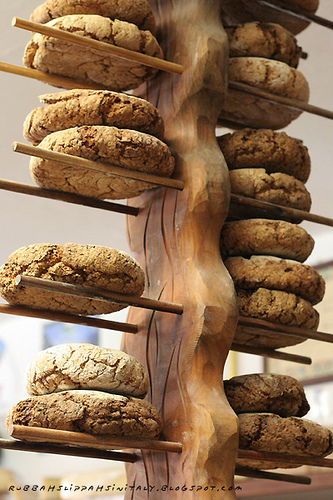
Pane Nero by Rubber Slippers in Italy
Why is bread from a bakery so much better than bread baked at home? Ever used a recipe to bake bread only to find that it looked nothing like the picture?
Imagine if you could bake bread using flour, water, salt and yeast and come out with consistently great bread, no matter what season. All you need is to understand how bread is created. See the 14 rules every professional baker uses to bake perfect bread every time:
Rule #1: SCALES: Weigh the ingredients rather than use cups and spoons as measurement.
Benefits:
- easy to double or halve a recipe
- the recipe will be more accurate
- the results will be more consistent
Rule #2: FLOUR: The type of flour will determine the qualities of the bread as different flour has differing amounts of gluten. Gluten is a substance made of proteins present in wheat flour. It gives structure and strength to baked goods.
Types:
- Strong flour is made from strong wheat. It has a higher gluten and protein content and is good for making bread. The more gluten in the flour, the firmer and chewier the bread.
- Weak flour is made from soft wheat. It has a low protein content and gluten and is best for cakes. The less gluten in the flour, the more tender the baked good.
Rule #3: LEAVENING AGENTS: Use leavening agents to expand the dough.
YEAST: Yeast is used to increase volume and produce shape and texture.
How: Yeast acts on sugars and converts them into carbon dioxide gas (which leavens the dough) and alcohol, which evaporate when baked.
Do:
- Mix the yeast with water to activate it and to ensure it will be more evenly distributed.
- Cool water is better in order to allow the yeast more time to develop its flavor.
- If using a standing mixer to knead the dough, it is best to use cold water as the machine will heat the dough.
Don’t:
- Be careful not to “cook” the yeast by adding water hotter than 46°C (115°F).
STARTER: Using a starter, biga or polish (see Ingredients: Yeast for a definition) will produce deeper flavor in the bread with a better texture. It also lengthens the shelf life of the bread.
Rule #4: WATER: Water is your friend. In order for gluten to develop, the protein needs to absorb water.
Ideal: The weight of the water should be 70 – 75% of the weight of the flour (ie if 1 kilo of flour is used, 700 to 750 grams of water should be added).
Not ideal: If not enough water is added, the dough will be hard and the texture will not develop.
Rule #5: FATS: Fat shortens gluten strands by lubricating the particles and preventing them from sticking together. Fats are tenderizers. This will change the texture of the bread by making it more tender.
Rule #6: KNEAD: Knead the dough to the correct consistency.
Do:
- Adjust the water or flour. Knead the dough for 5 minutes before determining if it is too dry or too wet.
- Feel the dough with your hands. As the gluten strands form, the dough will tighten and as the flour absorbs the water, it will become moist.
- Knead the dough for a sufficient amount of time to develop the gluten into long, elastic strands to create a dough that is perfectly elastic.
- The more kneading used to work the dough, the less time it will take for the dough to rise.
- When the dough can be stretched as thinly as possible (until almost transparent) without breaking, it is ready.
- If the dough becomes too difficult to work by hand, let the gluten rest for 10 minutes and then continue.
Don’t:
- If using a mixer, be careful the machine does not overheat the dough (60°C/140°F) and kill the yeast. If necessary, knead the dough by hand.
- Do not over-knead the dough so that the gluten breaks and creates a flabby dough which does not rise properly.
Rule #7: RISE: Let the dough ferment and rise.
Do:
- Allow the dough sufficient time to ferment in a cool spot so that the gluten strands capture the gas in tiny pockets. This is how bread develops its texture and flavour.
- Allow the gluten to ferment so that it becomes smoother and more elastic so it can to stretch further and hold more gas.
- Allow the dough to double or triple in size, ideally for 3 to 4 hours (depending on the temperature).
- The ideal temperature is 2 to 21°C (35 to 70°F) so that the flavor has time to develop. The lower the temperature, the longer it will take to rise.
- Allow extra time if fats, fruit, nuts or meat were added to the dough.
- Test the dough. The dough will have fermented completely when a finger pressed into the top of the dough leaves an indentation. If the dough springs back, it is not ready.
Don’t:
- Rush the fermentation otherwise the bread will be hard.
Rule #8: FOLD: Fold the dough to prepare it for proofing.
Why fold:
- Folding expels the carbon dioxide gas, relaxes the gluten and helps maintain a constant temperature in the dough.
- Shaping the dough determines the shape of the gluten strands.
- Folding gives the dough more body.
Do:
- There are several folding techniques but ultimately the dough should be taut across its surface.
Rule #9: PROOF: Proofing is the fermentation of the shaped bread.
Do:
- Cover the shaped dough to add more humidity and leave in a warm place until doubled in size.
- Test the dough. It is proofed when a finger pressed into the top of the dough springs back slightly.
- Brushing the dough with water before proofing will create a thin, crispy crust.
Don’t:
- Over-proof the dough. If, when a finger pressed into the top of the dough and the indentation remains, the dough is over-proofed. Over-proofed dough will produce a coarse texture and inferior flavor.
- Under-proof the dough. If, when a finger pressed into the top of the dough and the indentation springs back quickly, it is not yet proofed. Under-proofed dough will not expand sufficiently and will have a dense texture.
Rule #10: SCORE: Score the top of the hard crusted bread to allow it to expand.
Rule #11: TEMPERATURE: Preheat the oven to the correct temperature.
Do:
- Use the right temperature. The baking temperature is important since proteins (such as gluten) solidify at 74°C (165°F).
- Typical baking temperatures are 220 to 245°C (425 to 475°F).
Don’t:
- Use a temperature which is too high, otherwise the coagulation will start too soon before the gases have expanded sufficiently. The bread will have poor volume and the crust will split.
- Use a temperature which is too low otherwise the proteins will coagulate too late and the bread may collapse.
Rule #12: STEAM: Add steam to the bread while baking.
Why:
- The crust is formed as the water evaporates from the surface, leaving it dry.
- It is essential that the crust remains soft until after the bread has evenly expanded.
- Steam the dough to create a crisp crust.
How to add steam:
- Bake bread in a pre-heated cast iron Dutch oven with the lid on
- Add a pan of water to the bottom of the oven while it is heating
- Spray the oven with water three times during the first 10 minutes of baking
- Place a pan on the bottom of the oven and adding ice to the hot pan when the bread is added
- Place the bread on a preheated baking stone and invert a metal bowl over the bread.
Rule #13: TAP: Test the bread to see if it is finished baking.
Do:
- Tap the bottom of the bread to see if it is done. If it is cooked, it will have a hollow sound.
- Alternatively, you can test the temperature – which should be a minimum of 74°C and ideally within a range of 82 to 99°C (minimum of 165°F, ideal 180-210°F).
Rule #14: COOL: When the bread is finished baking, remove it from the oven to cool.
Do:
- Remove the bread from the pan and cool it on racks.
- Allow the moisture and alcohol to evaporate.
Don’t:
- Cool bread in a draft as the crust may crack.


Can you tell me why sometimes the crust are thicker than the other? Sometimes the Crust are too thick to bite? What went wrong?
It’s due to water content. For example, the higher the water content of the bread itself (60% vs 70% water to flour ratio) will have a thinner skin. The steam created in the oven and the moisture of the surface of the bread (brush the bread with water after shaping) will also create a thinner skin.
I bought some low carb bread mixes from Bob,s. I use a Panasonic bread maker. If I go by the instructions the bread has a texture of rubber. What is going wrong here do you think?
I tried adding some strong whole wheat flour. This seemed to work a little better, but the bread did not rise fully.
Hi, The answer must lie in the method recommended on the package or the mix’s compatibility with your machine. I would try contacting Bob’s directly as others must have had the same issue
I really loved your post. I read your blog quite often and I just shared it
on Twitter. Keep up the good work.
Thanks Tammy, that is very kind of you. I love hearing feedback from people. So happy you are enjoying it.